

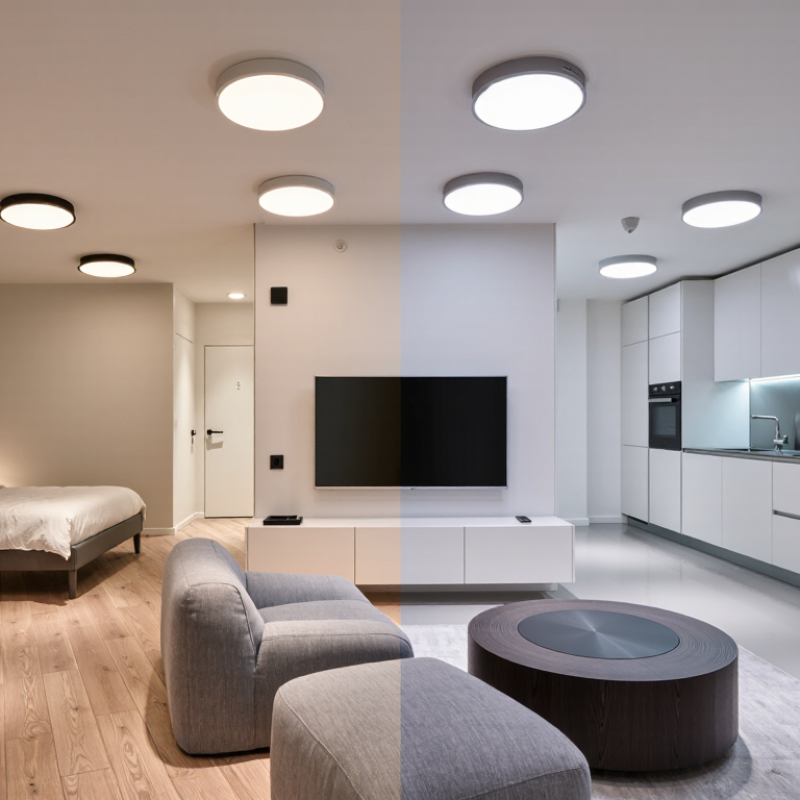
Choosing the best Smart Downlight can transform how a room feels, functions, and saves energy. Yet brightness alone should not decide your purchase. A warm 2700K light may soften a bedroom, while a cooler 4000K setting can support focused kitchen tasks. I have found that ceiling height, room size, and wall color change the result more than many product descriptions suggest. Small details matter.
A reliable Smart Downlight should offer stable app control, smooth dimming, and compatibility with your existing smart-home system. Check whether it supports Wi-Fi, Bluetooth, Zigbee, or a preferred voice assistant before buying. Also review its color-rendering rating, beam angle, insulation rating, and installation requirements. A high CRI can make food, artwork, and skin tones appear more natural. In damp areas, suitable moisture protection is essential. Safety comes first.
Do not ignore heat management. Poorly ventilated fittings may reduce performance over time. Certified products from reputable manufacturers usually provide clearer safety information and better warranty support. Still, “smart” does not always mean better. Some lights need cloud access, lose settings after a power cut, or respond slowly during network problems. That can become frustrating.
Measure carefully. Read independent reviews. Ask a qualified electrician when wiring is uncertain. The ideal Smart Downlight balances comfort, control, efficiency, appearance, and long-term reliability. Your room may need fewer features than expected. That is worth considering.
How to Choose the Best Smart Downlight for Your Home?
Define Your Home’s Smart Downlight Requirements
Start with the room, not the app. Measure its size, ceiling height, and existing cutout diameter. A kitchen needs clear, bright light for food preparation. A bedroom usually benefits from softer, warmer illumination. I once selected lights by appearance alone. The result looked attractive but felt harsh at night.
Write down your practical requirements. Check the needed brightness in lumens, color temperature, and color rendering quality. For reading areas, high color accuracy matters. For bathrooms, confirm suitable moisture protection and follow local electrical codes. Dimming compatibility also deserves attention. Some smart downlights may flicker with older wall dimmers.
Think about daily control. Do you need voice commands, schedules, motion sensing, or simple phone control? Check wireless range between the light and your router. Thick walls can weaken signals. Review data privacy settings, software support, and the reliability of remote access. These details are easy to ignore.
Plan installation carefully. Confirm the ceiling depth, wiring condition, and available circuit capacity. A qualified electrician should handle uncertain wiring. Request clear technical documents and a suitable warranty. Testing one light before buying many is wiser. My assumptions may be wrong, especially in older homes, so leave room to revise the plan.
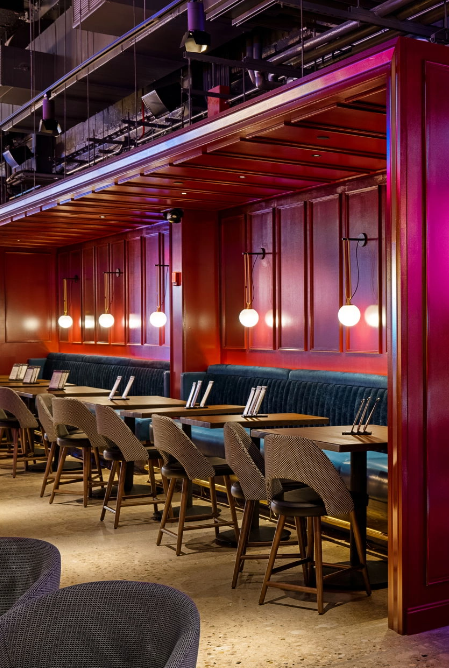
Use the recommended maintained illuminance levels as a starting point when choosing smart downlights. Kitchens generally require more light for food preparation, while bedrooms and hallways can use lower levels for comfort and navigation. After defining the target brightness, also check the downlight’s dimming range, color temperature adjustment, color rendering index, beam angle, IP rating, and compatibility with your smart-home system.
These practical residential planning targets are expressed in lux and may need adjustment according to room size, ceiling height, surface colors, task requirements, and the number of fixtures.
Choosing a smart downlight starts with light quality, not app features. I compare the color rendering index, or CRI, before checking connectivity. A CRI of 90 or higher usually shows skin, wood, and food more naturally. Lower ratings can make a room feel flat or slightly gray.
Brightness depends on lumens, room size, ceiling height, and wall color. A small bedroom may need less output than a kitchen with dark cabinets. I also check the beam angle. A narrow beam creates focused pools of light, while a wider beam spreads illumination more evenly. Glare matters too. Recessed lenses, deep trims, and careful spacing can make long evenings more comfortable. Measure the room first.
Color temperature changes the mood noticeably. Warm white near 2700K feels relaxed, while 3000K often suits living rooms and bedrooms. Around 4000K can support clearer task lighting in kitchens or work areas. Tunable models offer flexibility, but I once used cool white everywhere and found it tiring at night.
That choice looked practical on paper, yet felt wrong in daily use. Dimming performance deserves equal attention. Some lights flicker at low levels or require compatible dimmers. Check the minimum dimming range, power rating, and installation requirements before buying. A smart control system cannot repair harsh light or poor color rendering.
Choosing a smart downlight starts with your ceiling, not the app. I once assumed a thin fixture would fit every recessed opening. It did not. Measure the existing cutout, ceiling depth, and space around nearby joists. Check whether insulation touches the fitting. Some models need extra clearance for heat control. Others are rated for damp rooms, while standard fixtures may not be safe there.
Look above the ceiling if possible. A narrow cavity can block the driver or connector. Confirm the light’s voltage and installation method before buying several units. A qualified electrician can identify hidden wiring and verify whether a neutral wire is available. This matters because some smart controls work poorly without one. Small details become expensive problems.
Your smart home system also needs a compatibility check. Confirm the light supports your preferred connection, such as Wi-Fi, Bluetooth, or a dedicated mesh protocol. Then check hub requirements, app support, voice control, and local network performance. A crowded 2.4 GHz network may cause delayed responses. Test one downlight before installing a full row. It may pair successfully, yet fail when grouped with other devices. That is an imperfect result, but it reveals the real setup before your ceiling is full of fittings.
Smart downlights can improve a room, but the wrong choice wastes energy and patience. In my testing, brightness alone never predicted comfort. Check lumens, wattage, beam angle, and color quality before buying. Efficient LEDs should produce useful light without making the ceiling hot. Look for published performance data, not only attractive packaging. A dimmer may reduce consumption during quiet evening use. Yet efficiency claims need context.
Controls should match daily habits. A wall switch remains valuable when Wi-Fi fails. App controls offer schedules, scenes, and remote adjustment, but they add setup steps. Choose products with clear manuals and responsive physical controls. Check whether the dimming range stays smooth at low brightness. Some lights flicker visibly on camera, which can feel uncomfortable. I have overlooked this during showroom tests.
Privacy deserves equal attention. A connected downlight may collect room activity, voice commands, or usage times. Read the data policy and disable unnecessary permissions. Prefer local control when available, with strong account protection and regular software updates. Security depends on the whole network, not just the lamp. Separate guest devices from home equipment if your router supports it. I would also test power recovery, because an unexpected light can disturb sleep. Independent safety certification and compliance with local electrical rules matter more than decorative features. A qualified electrician should handle unfamiliar wiring.
| Evaluation Area | What to Check | Practical Benchmark | Why It Matters | How to Verify Before Buying |
|---|---|---|---|---|
| Energy Efficiency | Useful light output compared with electrical power consumption. | Approximately 80 lm/W or higher | A higher efficacy produces more light while using less electricity. | Check the lumens and watts listed on the product label or technical data sheet, then divide lumens by watts. |
| Standby Consumption | Power used when the light is switched off but remains connected to Wi-Fi, Bluetooth, or a hub. | Prefer a clearly stated low standby figure; lower is better | Smart lights can remain connected continuously, so standby use may affect long-term energy consumption. | Look for standby power information in the specification sheet or ask the manufacturer for a measured value. |
| Color Temperature | Whether the light can provide warm, neutral, or cool white light. | About 2,700–6,500 K for adjustable-white models | Warm light is generally comfortable for living areas, while cooler light can support task-oriented spaces. | Confirm the adjustable color-temperature range and whether the change is continuous or limited to preset steps. |
| Color Rendering | How accurately the light reveals the colors of furniture, artwork, food, and clothing. | CRI 80+ for general rooms; CRI 90+ for kitchens, dressing areas, and display spaces | Higher color-rendering performance usually gives objects a more natural appearance. | Check the stated CRI or Ra value. Treat claims without a published test method cautiously. |
| Dimming Performance | Brightness range, smoothness, minimum stable output, and flicker behavior. | Smooth dimming to approximately 10% or lower, without visible flicker | Reliable low-level dimming improves comfort and helps create suitable evening lighting. | Test the light at low brightness with a phone camera and observe whether it flickers, steps, or turns off unexpectedly. |
| Control Options | Available control methods, such as app, voice assistant, remote, wall switch, or automation platform. | App Physical switch Voice or hub option | Multiple control methods provide convenience while preserving usability if the internet or phone is unavailable. | Confirm which functions work locally and which require an account, cloud service, internet connection, or separate hub. |
| Local Operation | Whether basic lighting functions continue during an internet outage. | Manual on/off and last-state recovery should work without cloud access | Local control prevents a network problem from disabling essential room lighting. | Read the offline-operation section and check whether the product supports local Bluetooth, a local hub, or a conventional wall switch. |
| Automation | Schedules, scenes, occupancy responses, sunrise/sunset routines, and adaptive brightness. | Schedules and scenes with clear time-zone and failure behavior | Automation can reduce unnecessary operating time and improve comfort without requiring repeated manual adjustments. | Check whether routines run locally or in the cloud and whether they continue after a router, power, or service interruption. |
| Privacy | Data collection, account requirements, microphone access, location use, and third-party sharing. | No microphone or camera by default; minimal data collection and clear deletion controls | A downlight should not require unnecessary access to personal data for basic lighting functions. | Read the privacy policy and app permissions. Check whether voice features can be disabled and whether an account is mandatory. |
| Security | Software updates, encrypted communication, account protection, and network configuration. | Encrypted connections, automatic update support, and multi-factor authentication where available | Connected lighting is part of the home network and should receive protection against unauthorized access. | Look for a published security policy, update-support period, vulnerability-reporting process, and secure Wi-Fi setup. |
| Network Compatibility | Supported wireless bands and connection requirements. | Clearly stated compatibility with the home network; many products support 2.4 GHz Wi-Fi | Some smart lighting products cannot join a 5 GHz-only network and may need a compatible hub or phone connection. | Confirm supported Wi-Fi bands, Bluetooth requirements, hub compatibility, and whether setup requires temporary location permissions. |
| Installation Fit | Cutout diameter, ceiling depth, junction-box requirements, insulation contact, and bathroom suitability. | Exact fit for the existing cutout and installation conditions | A technically advanced light is unsuitable if it cannot be safely installed in the ceiling. | Compare the installation diagram with the ceiling opening, driver dimensions, insulation rating, and local electrical requirements. |
| Damp-Location Rating | Protection against moisture for bathrooms, kitchens, covered porches, or other humid areas. | Use only where the stated rating matches the location; wet locations require products specifically approved for them | Using a fixture in an unsuitable location can create safety, corrosion, and reliability problems. | Check the official IP or location rating and follow local electrical codes and installation instructions. |
| Lifespan and Warranty | Rated operating life, warranty duration, replacement policy, and availability of the control system. | A published life rating and warranty terms that cover both fixture and electronics | Integrated LEDs may be difficult to replace, so long-term support is important. | Review the warranty exclusions, expected operating hours, support contact, and whether the product still works if the cloud service ends. |
| Total Cost of Ownership | Purchase price, hub or subscription fees, electricity use, maintenance, and replacement cost. | Compare five-year ownership cost, not only the initial price | A low-cost light may become more expensive if it needs a hub, subscription, frequent replacement, or higher power consumption. | Estimate: purchase cost + accessories + subscriptions + electricity cost + likely replacement cost over the intended service period. |
Note: Performance values are general selection benchmarks. Always confirm the product’s current technical specifications, installation instructions, certification, and local electrical requirements before purchase or installation.
How to Choose the Best Smart Downlight for Your Home?
Installation needs often decide whether a smart downlight is practical. Measure the existing ceiling cutout before ordering. Check the junction box, ceiling depth, and available wiring. Some models need a neutral wire, while others may require an electrician. I once underestimated insulation clearance, and the fitting ran hotter than expected. That mistake changed my view of “easy installation.” Confirm whether the light suits bathrooms or covered outdoor areas. Look for a suitable ingress protection rating. Do not assume.
Durability depends on more than a strong-looking trim. Check heat dissipation, material quality, expected operating hours, and replaceable components. A sealed unit may resist dust, but replacement can become wasteful if the LED fails. Read the warranty conditions carefully. Keep the installation guide and purchase records. They matter later. Reliable products should also receive software updates and protect account access with secure controls. Verify electrical certifications required in your region, rather than trusting vague online claims.
Long-term value includes the total cost of ownership. Add the purchase price, installation, compatible controls, energy use, and possible subscription fees. A cheaper light may become expensive if it needs a separate hub or frequent replacement. Choose controls that still work during an internet outage when possible. Test brightness, color accuracy, and response time in your actual room. Warm light may feel comfortable in a bedroom but appear dull above a kitchen counter. My preference is not universal. Your daily habits should guide the decision.
©2024 Pine Vista LLC, DBA Design Manufacturing Group. All Rights Reserved.


©2024 Pine Vista LLC, DBA Design Manufacturing Group. All Rights Reserved.
